The problem with good or even half way decent BBQ’d chicken, seems as though no matter how much you make you never have enough leftover to do what you want with it. So this time I decided to plan for leftovers, and do smoked chicken three ways.
The first is going to be just straight chicken with nothing more than a little salt and pepper to season it. This will be for an attempt at smoked chicken salad later in the week.
The second is going to be chicken rubbed and no sauce. We will use this chicken later in the week chicken burritos and tacos. I hope to post on it when the time comes.
Last but certainly not least is smoked chicken finished in some home spun BBQ sauce.
Normally, I’d cook this on the ol’ faithful classic Weber kettle grill to show how it can be done on any grill. However three chickens would push the limits of my Weber. 
Well that and I haven’t been giving the UDS (Ugly Drum Smoker) much love lately. So we decided to fire her up for the chickens.
We started with just three basic chickens that were on sale at our local grocery.
First and foremost, be sure to remove the “giblet and heart package” from the inside then RINSE the chicken in cold running water… INSIDE AND OUT. Now towel it off with paper towels. Trim off anything that doesn’t look right. This will include a large flap of fat from the neck area of the chicken, and if there’s a large protrubance from the tail area you’ll want to remove that too. Also pull out any stray feather stems you may find still attached.
Here is one of our birds rinsed and trimmed.
Once you have your chicken cleaned up and ready I recommend letting it air dry for a few minutes. This will allow the oil to adhere to the chicken a little better.
Now here’s where I made my mistake this time. I decided to rub it then truss it, oh well live and learn. Most of the rub came off during the trussing, so next time back to the tried and true way. Here you can see the chicken as we truss it. Notice the lack of rub. That’s an easy fix though, we just added more later.
Now with the chickens, cleaned, trimmed, rubbed, trussed, and rubbed again, it’s time to get the UDS up and running.
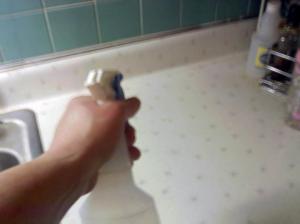
But first we EVERYTHING that may of even come close to coming into contact with the uncooked chicken MUST BE CLEANED and STERILIZED. I use a spray bottle of mixed with water and bleach to clean ALL counter areas, and add bleach to my dish water.
Here’s a nifty little hint that I’ve found rather useful. I start by preparing my dish water first, so that as I’m working, I have soapy bleach water I can rinse my hands in as I work.
On to the UDS
On the UDS there’s not really a conventional direct and indirect cooking method. With it, it’s just a matter of either putting something like a heat shield or drip pan between the meat and fire to protect the meat, or setting your meat directly over the fire. For the chicken we will be going “indirect” by placing a heat shield and drip pan between it and the fire.
First we will lay a bed of unlit charcoal in the firebox, and light a chimney starter full, to pour in on top of it.
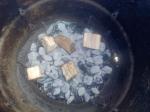
Once the charcoal in the chimney starter is ashed over and ready we will pour it in on top, and add the hickory chunks.


Then we’ll place the heat shield and drip pan into place, then add our cooking grill on the top rack. Oil it in preparation for the chickens. Lastly we’ll set the chickens on the UDS.
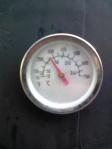
Finally, now it’s time to grab your favorite beverage (or several) and sit back and let the UDS do what you have called it to do. Your looking at about an hour and half cook time at 250f.
 All you really need to do here is keep an eye on your temperature and adjust your vents accordingly.
After about an hour you’ll need to start checking the internal temperature of your chicken, by inserting a meat thermometer into the fleshiest part of the the thigh while not hitting a bone.
If you’re going to add sauce you will want to start adding it when the thigh meat hits in the 160-170f range. This will give your sauce time to “cook” while the meat finishes up, without overcooking the sauce and burning the sugars in it. This is also the time to remove the trussing to allow the inside of the wings and legs to darken up, and the meat to loosen just a bit.
I prefer to hit it with sauce twice during the last half hour in 15 minute intervals. As soon as the temperature hits a nice 180f it’s time to pull your chicken. Let it rest 10-15 minutes to allow the juices to pull back in. Slice and serve.
I can’t help but chuckle at the “tan lines” on the rubbed and simply smoked chickens. The sauced one had them too, but they were hid by the sauce.


amanda
March 25, 2012 at 10:42 pm
This was a great post! Loved all of the pictures. I think I need to get Greg to do this for us! 🙂
LikeLike
Erin Jay Oren
March 26, 2012 at 4:48 pm
Awesome work and set by set how too!
LikeLike
mrdodd
March 26, 2012 at 4:54 pm
Thanks Amanda and Erin. Erin, the trussing-how to wasn’t quite as good as I’d like. I may go back and do a step by step on just how to truss a bird.
LikeLike
kandee2013
September 16, 2013 at 9:27 am
Love your site Sir … looking forward to reading more from you !! Stay hungry 🙂
LikeLike